Showing posts with label Recipe. Show all posts

Wednesday, June 20, 2012

Swiss Meringue Buttercream

This is Martha Stewart's Swiss Meringue Buttercream recipe. It makes a beautifully glossy and smooth frosting that isn't too sweet. I also like that the egg whites are heated, unlike French buttercream recipes that use uncooked egg whites. The recipe isn't hard, but you do have to follow the directions carefully, or you'll end up with a clumpy mess. I know because I've ended up with a clumpy mess! The recipe makes A LOT of frosting, so feel free to halve, or just throw the extra in the fridge or freezer. You'll need to beat it again before you use it.


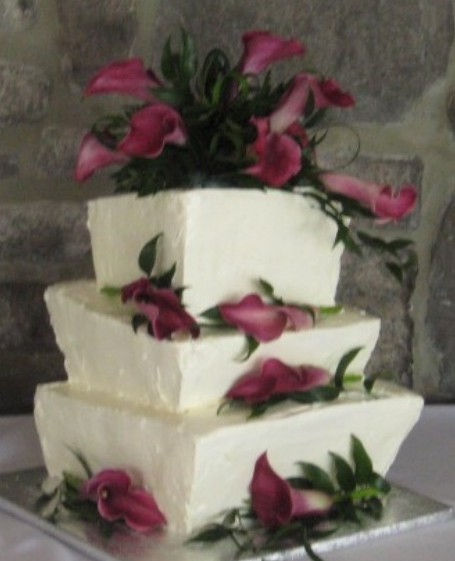
I used this recipe for all the cakes in the photos.  Although the buttercream is very creamy and seems like it would melt in the slightest heat, if made correctly it actually holds up really well.  


Swiss Meringue Buttercream

  • 1 1/2 cups sugar
  • 6 large egg whites
  • Pinch of salt
  • 1/4 teaspoon cream of tartar
  • 2 cups (4 sticks) unsalted butter, cut into tablespoons, room temperature
  • 1 teaspoon pure vanilla extract
    Heat sugar and eggs: Bring a saucepan filled with about 2 inches of water to a simmer. Meanwhile, combine sugar, egg whites, and salt in a large heat-proof mixing bowl. Set bowl over (not in) simmering water, and whisk frequently until whites are warm to the touch and sugar is dissolved, 8-10 minutes. (Heating the eggs relaxes their proteins, enabling the eggs to whip up higher and more quickly; the sugar also melts, for a silky smooth consistency.) Test by rubbing between your fingers; the mixture should feel smooth and not grainy.

    Whip meringue: Attach the bowl to a standing electric mixer fitted with the whisk attachment, and beat on low speed until foamy. Add cream of tartar, and beat on medium-high speed until stiff, glossy peaks form and mixture is cooled completely, about 10 minutes.   Feel the bottom of the bowl to make sure it isn't warm.

    Mix in butter: Reduce speed to medium-low; add butter 2 tablespoons at a time, beating to incorporate fully after each addition. Don't worry if the buttercream appears curdled at this point; it will become perfectly smooth again with continued beating. Keep the mixer at a low speed - high speeds will create a clumpy texture.  After all the butter has been incorporated, beat in vanilla.

    Finish: Switch to the paddle attachment. Beat on the lowest speed to reduce air bubbles, 3 to 5 minutes. Let stand, covered with plastic wrap, at room temperature.


    Thursday, May 31, 2012

    Blueberry Pancakes


    Bella harvested the first of the blueberries last night.  We were picking up branches from the storm last weekend and noticed the berries were ripe as we hauled the brush to the woods.  The raspberries are not far behind.  I've got lots more cleaning up to do this weekend since we were away for Memorial Day.  We spent a night at an amazing bed and breakfast, the Bella Vista in Akron.  French Toast for breakfast, my favorite! The next day we drove over to Hershey and spent the morning at Hershey Gardens, and the afternoon at Chocolate World.   (There is a recipe in here somewhere, I promise.) All this week Bella has been walking around, saying, quite dramatically, "I miss Chocolate World."  

    Anyway, the blueberries... I always try to complicate pancakes, adding sour cream, or yogurt, or trying to make some ridiculous recipe that calls for whipping the eggs whites (who wants to whip egg whites first thing in the morning?) without actually whipping them.  They (the pancakes, not the eggs) end up heavy and undercooked, and the last time I made blueberry pancakes Bella wouldn't even eat them.  So when a Cook's Illustrated basic pancake recipe landed in a my inbox a few weeks ago, I printed it out.  Simpler is better for lots of things, and especially pancakes. 

    These turned out perfectly.  I added the blueberries to each pancake as I poured the batter.  I think that works better than stirring them into the batter since they don't break up so much.  Of course we had extra, so they are in the freezer right now.  I'll pop them into a ziploc bag in a few hours and have toaster pancakes for next week. 


    Classic Pancakes

  • 2 cups (10 ounces) all-purpose flour
  • 2 tablespoons sugar
  • 2 teaspoons baking powder
  • ½ teaspoon baking soda
  • ½ teaspoon salt
  • 2 cups buttermilk (shortcut: add 2 T lemon juice or vinegar to a measuring cup, fill to 2 c line with milk, let sit for a few minutes to thicken)
  • 3 tablespoons unsalted butter, melted and cooled
  • 1 large egg
  • Vegetable oil for the pan
  • Fresh blueberries

  • Whisk the flour, sugar, baking powder, baking soda, and salt together in a large bowl. In a medium bowl, whisk the buttermilk, melted butter, and egg together. Make a well in the center of the flour mixture, pour the buttermilk mixture into the well, and gently whisk together until just incorporated with a few lumps remaining (do not overmix).

    Heat a 12-inch nonstick skillet or griddle pan over medium heat for 3 to 5 minutes. Brush the pan bottom with a thin layer of the oil. Using ¼ cup of batter per pancake, add the batter to the skillet and drop three or four blueberries on each pancake.  Cook until large bubbles begin to appear, about 2 minutes. Flip the pancakes and continue to cook until golden brown, about 1½ minutes. Transfer the pancakes to plates, or keep warm on a wire rack in the oven. Repeat with the remaining batter, brushing the skillet with oil as needed. 

    If you have leftovers, put them in the freezer on a wire rack, and when they're completely frozen, transfer to a ziploc bag.  Pop them in a toaster for a quick breakfast. 

    Saturday, March 24, 2012

    Easter Cream Wafers


    These little sandwich cookies were always my favorite thing about Easter.  Bella found the cookie cutters in spring shapes - aren't they just the cutest?!

    The cookies are quite delicate, so make sure they're completely cool before frosting.I used a basic butter frosting.  Divide into four bowls and color in pastels.

    Cream Wafers

    • 1 c butter, softened
    • 1/3 c whipping cream
    • 2 c flour
    • Granulated sugar
    Mix butter, cream and flour with an electric mixer.  Cover and chill.

    Heat oven to 375°.

    Roll about 1/3 of dough at a time to 1/8" thick.  Keep remaining dough chilled.  Cut into 1 1/2 inch rounds or shapes.  Pour granulated sugar into a shallow dish, and coat both side of each cookie with sugar.   Place on ungreased cookie sheet.  Prick with fork.

    Bake 7 - 9 minutes or just until set, but not brown.  Cool,  then frost with colored icing to make sandwiches.

    Thursday, December 15, 2011

    Chocolate Almond Bark with Sea Salt

    Sugar can be difficult to work with.  Stir the sugar and water together to dissolve, bring to a boil, then don't touch it until it turns golden brown.  Remove from the heat before you stir in the butter.  Use a high quality dark chocolate, and stir frequently as it melts.  Once most of the chocolate is melted, remove from the heat and continue to stir until completely melted.  Overheating will cause the chocolate to get clumpy.  Malden sea salt is a wonderful flaky salt to finish the candy with.  You can buy it online from Amazon.

    • 1/2 c sugar 
    • 1 T unsalted butter 
    • 1 1/2 c roasted almonds 
    • 1 pound good-quality dark chocolate (62%–70% cacao), finely chopped 
    • Coarse sea salt (for sprinkling) 

    Line a baking sheet with a silicone baking mat or foil. Combine sugar with 3 T water in a small saucepan. Stir over medium-low heat until sugar dissolves. Bring to a boil and cook without stirring, until caramel is dark amber, 5-10 minutes. Remove from heat. Immediately add butter; whisk until melted. Add almonds; stir until well coated. Transfer to baking sheet, spreading out to separate nuts. Let cool. Break up any large clumps of nuts. Set aside 1/4 of nuts.

    Stir chocolate in a medium bowl set over a saucepan of simmering water until melted. Remove from heat, add nuts from baking sheet, and stir quickly to combine. Spread chocolate-nut mixture on same baking sheet, keeping nuts in a single layer. Top with the reserved nuts; sprinkle with salt. Chill until chocolate is set, about 3 hours.

    Break bark into pieces and store between layers of parchment or waxed paper. DO AHEAD: Can be made 1 week ahead. Keep chilled.

    Sunday, December 11, 2011

    Nut Brittle

    This is a basic, no frills recipe but still delicious.  It can be made in the microwave, and doesn't need to go in the fridge to chill, so it's also easy to fit in with your other Christmas baking.  Use your favorite mixed nuts, or just one variety.  Use a silicone spatula sprayed with cooking spray for easy cleanup.

    • Nonstick cooking spray 
    • 1 1/2 c sugar 
    • 1/2 c light corn syrup 
    • 3/4 tsp salt 
    • 2 T butter 
    • 1 1/2 c mixed nuts, such as pecan halves, cashews, pistachios, coarsely chopped if large 
    • 1 tsp vanilla extract 
    • 1/4 tsp baking soda 

    Line a rimmed baking sheet with foil and spray with nonstick spray; set aside.

    In a 2-quart glass measuring c, combine sugar, corn syrup, and salt, stirring until sugar is moistened. Microwave on high for 4 minutes. Stir in butter and nuts; return to microwave for about 5 minutes, until the sugar mixture is thick, bubbly, and very pale brown in color. Mixture is very hot; use handle when holding and pouring.

    Remove from microwave, stir in vanilla and baking soda (mixture may foam up). Immediately pour onto prepared baking sheet, spreading mixture as thinly as possible with a heatproof spatula. Let stand 20 minutes until hardened, then lift off sheet, and break brittle into bite-size pieces.

    Sunday, October 30, 2011

    Sweet Potato Biscuits


    This recipe is my favorite thing to make with leftover sweet potatoes, though I'm just as likely to cook a sweet potato especially for biscuits if I have the urge.  They're soft and tender, and quite forgiving - I wouldn't go crazy with kneading, but it is hard to over-work the dough.  The amount of milk you add will depend on the moisture content of the sweet potatoes - you want a soft, but workable dough.  Feel free to use leftover mashed sweet potatoes even if they have other ingredients added - just remember that your biscuits will have the flavor of whatever's in the sweet potatoes.  I like to cut them into little squares, and bake them close together so they're nice and soft, but make whatever shape you want.  Just pat the dough to an even thickness - don't bother with a rolling pin for this recipe.  Serve them warm from the oven with a little homemade blueberry jam on top, and you won't be disappointed.

    Sweet Potato Biscuits

    • 1 1/4 c flour
    • 2 T sugar
    • 4 tsp baking powder
    • 1/2 tsp salt
    • 3/4 c sweet potatoes, cooked and mashed
    • 1/4 c butter, softened
    • 2-4 T milk
    Heat oven to 450°.  Stir together flour, sugar, baking powder, and salt.  In a separate large bowl, mix together the sweet potato and butter.  Add flour mixture to sweet potato mixture and stir until all the flour is incorporated.  Stir in milk 1 T at time to make a soft dough.  Knead lightly on a floured surface, and pat to 1/2" thick.  Cut into even pieces and bake 10-15 minutes until golden brown on top and bottom.

    Saturday, October 1, 2011

    Fall Flavor: Maple & Caramelized Onion Sweet Potatoes


    Time for fall!  I love the richness of this dish, and sweet potatoes always add a pretty orange touch to a fall table.  This is absolutely my favorite sweet potato recipe.  I never liked them much until I got some at the farmer's market a few years ago and realized that fresh sweet potatoes were a completely different animal than store-bought.  Amazing the difference.  Mom's organic market often carries a Japanese sweet potato with white flesh that is also quite tasty.

    Anyway, I never have understood "sweet potato casserole" because it really seems to be more "sweet" than "sweet potato."   But I love the caramelized onion sweetness in this dish, and I often add cayenne or crushed red pepper in place of the black pepper for a bit of heat.  The potatoes do tend to cool quickly, so make sure to use hot water and serve in a warmed dish.  The recipe can easily be doubled or tripled, though you may have to puree in batches.  If you try to make this for Thanksgiving you may get a few frowns - people do love their marshmallows - but they'll come around.

    Maple Sweet Potatoes with Caramelized Onion


    • 2 large sweet potatoes

    • 4 T maple syrup

    • 2 T olive oil

    • 2 tsp salt

    • 1 tsp pepper

    • 1 T butter

    • 1 tsp dried rosemary

    • 1 large sweet onion, thinly sliced


    Heat oven to 375°.  Peel and cube sweet potatoes.  Toss wtih 2 T maple syrup, 1 T olive oil, salt, and pepper in a large bowl.  Line a baking sheet with foil and spray with cooking spray. Arrange sweet potatoes on the sheet in a single layer. Roast 30-40 minutes, stirring halfway through, until potatoes are fork-tender.

    Meanwhile, heat butter and remaining 1 T olive oil in a large saute pan over medium high heat.  Add onion, remaining 2 T maple syrup, and rosemary, crumbled.  Season with salt and pepper.  Cook, stirring frequently, until onion begins to brown. Reduce heat and cook 15-20 minutes more, until onions are soft and caramelized. Turn off heat but keep onions warm.

    Transfer potatoes to a food processor.  Add 2 T hot water.  Pulse until just blended, adding additional hot water as needed to create a smooth puree.  Add half the caramelized onion and pulse to mix well.  Spread sweet potatoes in a warmed dish and top with reserved onion.

    Thursday, September 29, 2011

    Green Beans Galore

    image

    My green beans are making up for the past two years when I've gotten none!  I made pesto tonight and tossed it with green beans and pasta.  No picture-honestly, it wasn't the most appealing -looking dish, but really yummy.  Bella had three servings!


    I have found I like green beans best when they're blanched and then cooked.  They seem to stay greener and crisper that way.


    Cook in boiling salted water for 5-7 minutes then dunk in icewater to chill.  You can then refrigerate then for later, or go ahead and cook with them right away-they'll need 2-4 more minutes of cooking time.

    Sunday, August 21, 2011

    Banana Bread


    First off, I don't like bananas - can't stand 'em.  Taste, texture, smell - nothing about them I like.  But I've always sort of liked banana bread.  My main complaint was that my Mom's banana bread always ended up with a soggy, banana-y section on the top in the middle.  I guess it was too moist, or didn't bake long enough, but the obvious banana element ruined it for me (sorry Mom!).  Anyway, I do buy bananas because the kids like them, and occasionally we end up with extra, over-ripe ones, and I can't just throw them away!  So I found a recipe from Cook's Illustrated, which does involve a few extra steps, but turns out to be well worth the trouble.  The following recipe is my version - I omitted an additional step that added fresh sliced bananas to the top.  I highly recommend adding the nuts - any nuts will do.  The bread is naturally very moist, and the nuts add some welcome texture. My favorite way to eat this bread is toasted (careful getting it out of the toaster - it will crumble), spread with unsalted butter, and topped with a sprinkle of sea salt.


    Banana Bread


    • 1 ¾ c flour

    • 1 tsp baking soda

    • 1/2 tsp salt

    • 4-5 large, very ripe bananas

    • 8 T unsalted butter, melted and cooled slightly

    • 2 large eggs

    • ¾ c packed light brown sugar

    • 1 tsp vanilla extract

    • ½ c walnuts , toasted and coarsely chopped (optional)


    Heat oven to 350°. Spray 8½ by 4½-inch loaf pan with nonstick cooking spray. Whisk flour, baking soda, and salt together in large bowl.

    Place bananas in microwave-safe bowl; cover with plastic wrap and cut several steam vents in plastic with paring knife. Microwave on high power until bananas are soft and have released liquid, about 5 minutes. Transfer bananas to fine-mesh strainer placed over medium bowl and allow to drain, stirring occasionally, 15 minutes (you should have ½ to ¾ cup liquid).  *If using frozen bananas, skip the microwave and put in the mesh strainer to thaw and drain.  Mash occasionally with a fork until completely thawed and proceed.

    Transfer liquid to medium saucepan and cook over medium-high heat until reduced to ¼ cup, about 5 minutes. Remove pan from heat, stir reduced liquid into bananas, and mash with potato masher or fork until fairly smooth. Whisk in butter, eggs, brown sugar, and vanilla.

    Pour banana mixture into flour mixture and stir until just combined with some streaks of flour remaining. Gently fold in walnuts, if using. Scrape batter into prepared pan.

    Bake until toothpick inserted in center of loaf comes out clean, 55 to 65 minutes. Cool bread in pan on wire rack 15 minutes, then remove loaf from pan and continue to cool on wire rack. Serve warm or at room temperature.

    Thursday, August 11, 2011

    Tomato Feta Salad


    It has been so hot most things have dried up in the garden, and the squash bugs finally did in the zucchini.  I have one okra plant that came up and it has been a producer.  The other success story is the tomatoes, and I have high hopes for the second round of green beans.

    Shawn reminded me of this salad we used to make at the cafe.  We have cherry tomatoes coming out our ears, and every time I go to my mom's house she gives me another basketful.  I happened to have some feta in the fridge, so I whipped this up.

    Very simple - halve cherry tomatoes, toss with feta, salt, pepper, olive oil, chopped parsley, and lemon juice.  Go easy on the salt at first in case your feta is salty.  I like to rinse the tomatoes after I slice them to get rid of some of the seeds.  It's best fresh, but it will keep in the fridge.  Since olive oil solidifies when cold, you should bring it to room temperature before serving.


    Saturday, May 14, 2011

    Fruit pizza

    image

    Yummy & easy!  Sugar cookies with cream cheese icing and sliced fruit.  Cut them into different shapes if you want.  Blot the fruit dry after you cut it to keep the cookies from getting soggy too fast.

    Wednesday, May 4, 2011

    Chocolate Chip Brownies (Gluten Free)


    If you didn't know these were gluten free, you'd never guess.  Even if you did know they might be your favorite brownies ever.  The texture is the best I've seen from any gluten free baked good, and the flavor is rich and chocolaty.   They'll sink a little in the middle after you take them out of the oven, but that's ok.

    I used a food processor to mix the brownies because I wanted to make sure they were very smooth, but as long as your almond butter is smooth-roasted, a regular mixer should do the trick.  I imagine these would not suffer from a substitution (or addition!) of peanut butter chips, or a swirl of cream cheese & peanut butter blended together.

    Here's the recipe, inspired by Elena's Pantry:

    • 1 (16) ounce jar almond butter, smooth roasted

    • 2 eggs

    • 1 ¼ cups agave nectar (this is slightly more than the smaller jars, but you can substitute honey for the remainder if you're a little short)

    • 1 tablespoon vanilla extract

    • ½ cup cocoa powder

    • 1 teaspoon sea salt (or 1/2 tsp if your almond butter is salted)

    • 1 teaspoon baking soda

    • 1 cup chocolate chips


    Heat oven to 325°.  Spray a 13 x 9 baking dish (preferably glass) with baking spray.

    Blend the almond butter in a food processor or mixer.  Blend in the eggs, then the agave nectar and vanilla until smooth.  Mix in the cocoa, salt, and baking soda.  Stir in chocolate chips by hand.  Pour into prepared pan and bake 35-40 minutes.

    Friday, February 25, 2011

    Comfort Food with a Kick

    Here's another winner from the February issue of Bon Appetite.  (Sometimes I feel like a cheerleader for the magazine, but it's the only one I get!).  It is quite spicy - I made an entire box of pasta and mixed half with plain tomato sauce for the girls.

    The flavor is different - the peperoncini juice definitely adds a unique element, and I really liked the crunchy pepper rings.  It's comfort food with a kick.  Add a green salad, and you have a perfect winter meal.

    I made it just as the recipe indicates, so I'll give you the link: Pasta with  Sausage, Shrimp, and Peperoncini

    Easy Paprika Chicken

    imageThis recipe makes enough for a crowd, or lots of leftovers.  The paprika lends a smoky, not quite spicy taste  - if you'd like a little more kick, add a little crushed red pepper to the spice blend.  Any kind of  paprika will work.  I used a blend of Hungarian and sweet.

    The kids were skeptical while I was cooking, but I got a high compliment at dinner: "This is better than I thought it would be!"

    • 3 lbs chicken breasts, trimmed and cut into 1-2" pieces

    • 2 1/2 teaspoons kosher salt

    • 2 1/2 teaspoons black pepper

    • 2 1/2 teaspoons dried oregano

    • 2 1/2 teaspoons dried basil

    • 5 tablespoons paprika

    • 2 tablespoons olive oil

    • 1 large white or yellow onion, sliced

    • 4 garlic cloves, sliced as thinly as possible

    • 3 bay leaves

    • 1 28 oz can crushed tomatoes

    • 3/4 cup heavy cream or sour cream

    • 1 T lemon juice

    • 1 bag frozen peas


    Mix together spices in a large bowl.  Add chicken and toss to coat.

    In a large skillet or dutch oven, heat 2 tablespoons of olive oil over medium-high.  Add half the chicken and cook 4-5 minutes, turning once, until lightly browned on all sides.  Remove chicken and set aside.

    Add some more olive oil to the pan if needed, reduce heat to medium, and saute onions, scraping up browned  bits from the pan, until softened, 6-8 minutes.  Add garlic and saute 30 seconds.

    Reduce heat to low and add in the bay leaves and tomatoes and stir to combine. Return the chicken to the pan and cover. Simmer for 10-15 minutes until chicken is cooked through, then remove lid, add peas, and cook 5-10 minutes more until sauce is thickened slightly.

    Stir lemon juice into heavy cream.  (Omit lemon juice if using sour cream).  Stir a few tablespoons tomato sauce into cream to temper, then add cream to the pan and stir to combine.  Heat through, then serve over rice or pasta, garnishing with grated Parmesan.

    Sunday, February 20, 2011

    Roasted Smashed Potatoes

    Bella does not like potatoes (other than French fries) and I can't say I blame her, because I've never been a big fan myself (except for French fries).  But this recipe was a big hit with all the kids, and Bella even had seconds!  As Aniston said, "they're like French fries but smashed!"

    They really are good - the inside is creamy and soft, and the skin gets super crispy and crackly.  Smashing the potatoes allows the seasonings to cover a larger surface area, so each bite has just the right amount of flavor.

    They're  best right out of the oven, and if you have any leftover, I'd recommend reheating in the oven, or just adding a little milk and turning them into mashed potatoes.  The recipe is from Cook's Illustrated (subscription required), but I added the cheese.

    Roasted Smashed Potatoes


    • 2 lbs small red potatoes, scrubbed

    • 6 T extra virgin olive oil

    • 1 tsp thyme (fresh  or dried)

    • Kosher salt & pepper

    • Parmesan or Asiago cheese


    Heat oven to 500°.  Arrange potatoes on a large baking sheet (you're going to smash the potatoes, so make sure you have extra room).  Pour 3/4 c water on the sheet and cover tightly with foil.  Roast 25-30 minutes until potatoes are very soft.  A fork or paring knife will easily slip in and out.  If any water remains on the baking sheet, blot dry with a paper towel.

    Drizzle 3 T oil over potatoes and roll to coat.  Use a flat bottomed heavy glass and smash each potato to 1/3 to 1/2" thick, spacing evenly on the baking sheet.   Sprinkle with thyme and season generously with salt and pepper.  Drizzle evenly with the remaining 3 T oil.  Roast 20-30 minutes longer until potatoes are well browned.  Remove from oven, sprinkle grated cheese evenly over potatoes, and return to oven for 5 minutes.  Serve hot.

    Monday, February 14, 2011

    Treats for Sweets-Happy Valentine's Day!

    We made these for Valentine's Day in my Mommy & Me cooking class, then Bella and I made them again for her class Valentine's party.  They're really cute, and really easy.  I normally frown upon things like refrigerated pie dough, but these are more novelty than confection, so I made an exception.


    You'll need slips of paper about 2" by 1/4".  Write your fortunes in non-toxic marker, then cut them out - much easier than writing on itty-bitty pieces of paper.


    Lay out a circle of pie dough and use a 3" cookie cutter to cut out 7 rounds.  Brush just the edges with water, then place a folded fortune in the middle.  The paper will stick to the water, so try not to get the fortune wet.  Fold over and press gently to seal.  Then gently pinch the corners and fold them together.  Lay on a lined baking sheet.


    *Older kids can help write fortunes and fold the cookies.   Younger kids can brush the tops with water and decorate.*

    Brush the tops very lightly with water, and sprinkle with colored sugar.  Bake in a 350° oven for 20 minutes, until just beginning to brown around the edges.  Remove from oven, cool, and package in Chinese take-out containers  (you can find these at a craft store).

    Saturday, February 12, 2011

    Brown Rice Risotto w Winter Squash & Pecans


    I found this recipe in Bon Apetite this month, and since I still have butternut squash in the basement from my garden, I thought I'd give it a try.  I've been looking for meatless recipes that are still hearty enough to satisfy the family, and that aren't soup. For some reason my family equates soup with torture.  Anyway, I made a few modifications, including using brown arborio rice and substituting pecans for the pine nuts.

    It does take considerably longer with brown rice, but I think the brown rice is a little more forgiving - I was able to achieve that creamy risotto texture with little stirring and none of the gumminess that sometimes plagues white rice risotto.   This could easily be a wonderful vegetarian dish by using vegetable stock instead of chicken stock, and of course, you wouldn't want to use bacon fat!  I couldn't resist though - bacon makes everything taste better, and I keep leftovers in the fridge for recipes like this that benefit from that bit of extra flavor.

    Here's my version:

    Brown Rice Risotto w Winter Squash & Pecans


  • 4 T olive oil or bacon fat, divided

  • 1 medium butternut squash, peeled, seeded, cut into 1/2-inch cubes

  • Sea salt

  • 1 T finely chopped fresh sage

  • 1 T Sherry

  • 1 onion, chopped

  • 5-6 c low sodium chicken broth

  • 1 1/2 c brown arborio rice

  • 1/4 c medium-dry Sherry or Marsala

  • 3/4 c pecans, chopped

  • Shaved Parmesan cheese (optional)

  •  

    Heat 2 T olive oil in heavy large nonstick skillet over high heat. Add squash; sprinkle with sea salt and sauté until beginning to brown, stirring often, about 5 minutes. Reduce heat to medium, add chopped sage and pecans, and cook until squash is  just tender, stirring often, about 8 minutes. Sprinkle Sherry over; toss to incorporate. Transfer squash to plate. Wipe skillet clean.

    Heat remaining 2 T olive oil in same skillet over high heat. Add chopped onions, sprinkle with sea salt, and sauté until onions are soft and beginning to brown, about 6 minutes.  Bring chicken stock to a simmer in large saucepan. Cover and keep warm over low heat. (Or microwave, reheating as necessary so you are adding warm stock to the rice.)

    Add arborio rice to onions in skillet. Stir until rice is slightly translucent, about 4 minutes. Add Sherry; stir until absorbed. Add 1 cup warm broth; stir occasionally until almost all liquid is absorbed, about 5 minutes.   Add three more cups of broth, letting the rice absorb each cup before adding the next, and stirring occasionally.  Add the remaining cup of stock, reduce heat, and cover the pan, cooking 15-20 minutes until rice is just tender but still firm to bite and risotto is creamy.  Remove lid, add squash mixture, and cook until squash is heated through and most of the liquid is absorbed, 5-10 minutes.  Season with salt and pepper.

    Top risotto with shaved Parmesan.

    Wednesday, February 2, 2011

    Sloppy Joes

    These are a far cry from the stuff in a can.  I use ground turkey breast, so they're low in fat, and with all the veggies in the sauce, they're a perfect one-dish meal.   I make them a little on the sweet side to appeal to the kids - you can cut back to 1-2 T on the sugar if you'd like, and substitute cayenne pepper for the paprika to make them spicy.

    I like to use potato rolls.  They're nice and soft and I pull out the inside to make a pocket for the meat - fewer carbs and less mess!  Sometimes I get the smaller dinner rolls instead for the kids.  Two regular sandwiches is too much, but two dinner roll size are perfect.


    Sloppy Joes


    • 1 T oil

    • 1 medium bell pepper, diced

    • 1/2 medium onion, diced

    • 1 1/4 lb ground turkey breast

    • 2 cloves garlic, minced

    • 2 medium tomatoes, diced (or 1 can diced tomatoes)

    • 1 T Worchestershire

    • 1 T red wine vinegar

    • 3 T brown sugar

    • pinch ground cloves

    • pinch ground allspice

    • 1/2 tsp thyme

    • 1/2 tsp paprika

    • salt and pepper

    • 1 c ketchup

    • hamburger buns


    Heat oil in a large skillet over medium high heat.  Add the peppers and onions and saute 3-4 minutes until beginning to soften.  Add the turkey and break up with a spoon.  Saute until turkey is fully cooked.  Add garlic and cook 30 seconds.  Add tomatoes (with juice), Worchestershire, vinegar, sugar, and spices.  Stir 1-2 minutes until combined.  Add ketchup, reduce heat, and simmer 15-20 minutes. If the sloppy joes look too dry, add a little water or chicken stock.  Adjust salt and pepper if needed, and serve.

    Tuesday, January 18, 2011

    Caramel Apples

    These are the cutest little things!  Use a melon baller to scoop out balls of Granny Smith apples, insert lollipop stick, pat dry, then dip in caramel and assorted toppings.  (I forgot to dry my apples, so the caramel is sliding off!).

    These are the perfect size for kids, both for making and eating.  Mini chocolate chips, chopped nuts, mini M&M's, and sprinkles all make great toppings.  You can also dip the apples in melted white or semisweet chocolate.

    Saturday, November 27, 2010

    Cider Spice Chiffon Cake

    I really didn't think I'd care much for this cake, but I had several other recipes using apple cider, so I decided to try it. It is amazing! It's like an apple cider angel food cake. The cider flavor really comes through, but not in an overpowering way, and the spice is just right.  I based it on a recipe from Cook's Country, but replaced the oil with applesauce - less fat, more apple flavor!  I got fresh apple cider from McCutcheon's.  Look for it in the refrigerated produce section at the grocery.

    Make sure to use an ungreased tube pan - one with a removable bottom is even better.  When it comes out of the oven, turn it upside down on a narrow necked bottle to cool.


    Cider Spice Chiffon Cake


    BATTER:

    • · 5 large eggs, separated

    • · 1 tsp cream of tartar

    • · 1 ¼ c sugar

    • · 1 1/3 c all purpose flour

    • · 2 tsp baking powder

    • · ½ tsp salt

    • · 1 tsp ground cinnamon

    • · ½ tsp ground allspice

    • · ¾ c apple cider

    • · ½ c unsweetened applesauce

    • · 1 T vanilla extract


    GLAZE:

    • · 3 T apple cider

    • · 2 oz cream cheese , softened

    • · ¼ tsp ground cinnamon

    • · 1/8 tsp ground allspice

    • · 1 ½ c confectioners' sugar


    Heat oven to 325°. With electric mixer fitted with whisk attachment, whip egg whites and cream of tartar on medium- high speed until soft peaks form, about 2 minutes. With mixer running, slowly add 2 tablespoons sugar and whip until just stiff and glossy, about 1 minute; set aside.


    Combine flour, remaining sugar, baking powder, salt, cinnamon and allspice in large bowl. Whisk cider, applesauce, egg yolks, and vanilla in medium bowl until smooth. Whisk wet mixture into flour mixture until smooth. Whisk one-third whipped egg whites into batter, then gently fold in remaining whites, 1 scoop at a time, until well combined. Scrape mixture into 16-cup ungreased tube pan.


    Bake until toothpick inserted into center comes out clean and cracks in cake appear dry, 50-55 minutes. Cool, inverted, to room temperature, about 3 hours.


    Whisk apple cider, cream cheese, cinnamon, and allspice in medium bowl until smooth. Add confectioners' sugar and whisk until smooth. Pour glaze over cooled cake. Let glaze set 15 minutes.


    Apple Cider on FoodistaApple Cider